Build, deploy, anonymize config, zip package, git commit, push from a single command

gitautomateWhile working on open source projects, you have to frequently build your code, clean up all temporary files, remove your own passwords, connections strings from web.config, then create a binary deployment package in a zip format and then commit and git push to GitHub. Let’s automate all these using a configurable powershell script.

Here’s the full script.

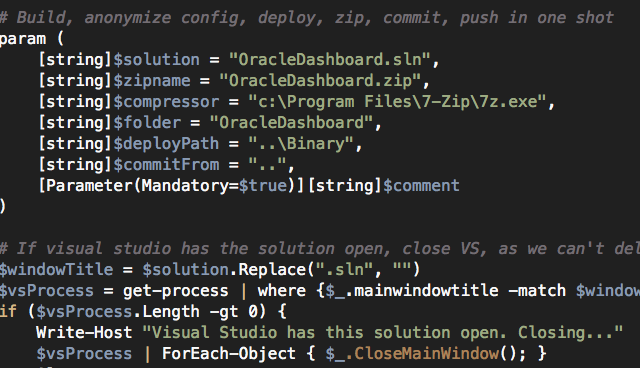
First step, let’s define the parameters for the script with some default values:
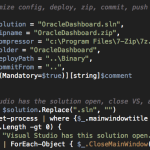
param (
    [string]$solution = "OracleDashboard.sln",
    [string]$zipname = "OracleDashboard.zip",
    [string]$compressor = "c:\Program Files\7-Zip\7z.exe",
    [string]$folder = "OracleDashboard",
    [string]$deployPath = "..\Binary",
    [string]$commitFrom = "..",
    [Parameter(Mandatory=$true)][string]$comment
)

Some description of these parameters:

  • $solution = path of the solution file relative to the script location
  • $zipname = name of the zip file.
  • $compressor = 7-zip’s 7z.exe file path.
  • $folder = the folder that contains the code, which is zipped.
  • $deployPath = relative path where the zip file will be moved to.
  • $commitFrom = relative path where the script will run git commit and git push from.
  • $comment = A comment for the git commit.

The first thing the script does is look for the solution open in Visual Studio and close it. You can comment this section out if you want. But if Visual Studio is open, then /obj folder cannot be deleted.

# If visual studio has the solution open, close VS, as we can't delete obj folder while it is open
$windowTitle = $solution.Replace(".sln", "")
$vsProcess = get-process | where {$_.mainwindowtitle -match $windowTitle -and $_.ProcessName -eq "devenv"} 
if ($vsProcess.Length -gt 0) {
    Write-Host "Visual Studio has this solution open. Closing..."
    $vsProcess | ForEach-Object { $_.CloseMainWindow(); }
    Sleep 5
    Read-Host "Press ENTER to proceed if Visual Studio is closed"
    $vsProcess = get-process | where {$_.mainwindowtitle -match $windowTitle -and $_.ProcessName -eq "devenv"} 
    if ($vsProcess.Length -gt 0) {
        Write-Host "Visual Studio still has the solution open. Aborting."
        Return
    }
}

Next step is to do some spring cleaning:

Push-Location

if (Test-Path $zipname) { rm $zipname; }

# Clean up deploy folder 
rm $deployPath\*.* -Force -Recurse

First remember the current path. We have to come back to this path after we are done. Then remove the zip file if it already exists. Then cleanup the $deployPath. You can remove this if you want to keep old deployment packages. Then you have to handle generation of unique file names for the packages.

Now, let’s build and remove /obj folder:

# Build new version
msbuild /verbosity:minimal $solution

# Delete obj
if (Test-Path $folder\obj) { rm $folder\obj -Force -Recurse }

Next step: remove all sensitive information from the web.config, which includes connection strings, authorization block, appSettings entries etc. This is all up to you to customize:

# backup the web.config and remove sensitive entries before pushing to git, eg connectionString
[string]$filename = gi $folder\web.config 
[string]$backup = [System.IO.File]::ReadAllText($filename)
$xml =

[xml][/xml]

$backup $xml.PreserveWhitespace = $true foreach($n in $xml.configuration.connectionStrings.add) { $n.ParentNode.RemoveChild($n); } # Anonymize any sensitive appSettings entry foreach($n in $xml.configuration.appSettings.add) { switch($n.key) { "Password" { $n.value = "Password" } } } # Remove authorization blocks $xml.configuration.'system.web'.authorization.RemoveAll() $xml.Save($filename)

Finally, let’s run some regular expression check to ensure the web.config does not have any sensitive information left accidentally. Again, this is all up to you to customize.

# verify if web.config still contains any sensitive info
[string]$config = gc $folder\web.config
if ( ($config -match 'connectionString="\w+') -or ($config -match 'users="\w+') ) {
    Write-Host "Configuration file is not cleaned."
    # Restore web.config
    [System.IO.File]::WriteAllText($filename, $backup)
    Exit
}

Now time to compress the source folder and create a zip file using 7-zip.

# Compress the solution folder and copy to deploy folder
cmd /c $compressor a -tzip $zipname $folder -r 
cmd /c copy $zipname $deployPath /Y
cmd /c del $zipname

Finally git commit and push:

# Commit and push to GitHub
cd $commitFrom
git pull
git add -A *.*
git commit -a -m $comment
git push 
Pop-Location

And last step is to restore your own web.config, that was anonymized:

# Restore web.config
[System.IO.File]::WriteAllText($filename, $backup)

That’s it. Now all you have to do is, just hit ./gitpush.ps1 from Powershell command line and you are done!

Synchronize File Date Time in multiple servers, solve IIS ETag problem

When you deploy the same website on multiple webservers, you end up having each file getting different last modified date. As a result, each IIS produces different ETag for the static files. If user is hitting different servers for the same file (due to load balancing), each IIS is responding with different ETag and thus browser downloading the same file over and over again. if you have 3 servers, same user has most likely downloaded the same file thrice. This gives poor page load performance.

Moreover, if you want to mirror two or more locations using one location as a base, not only you need to copy the same files but you need to set the same Create Date and Last Modified Date on the files. Otherwise they aren’t true mirror. There are various use cases where you need a complete mirror not only at file content level but also at file date time level.

Here’s a powershell script that will do the job for you:

# Path of the base folder. File date times in this folder is used as the base.
$SourceFolder = ".Folder1"
# Put all the other locations here. These locations must have the same folder structure as the base
$DestFolders = @('.Folder2', '.Folder3')

function sync($sourcePath, $destinationPath)
{
$sourceFiles = [System.IO.Directory]::GetFiles($sourcePath);
foreach ($sourceFileName in $sourceFiles)
{
$sourceFile = Get-Item $sourceFileName
$destFilePath = Join-Path -Path $destinationPath -ChildPath $sourceFile.Name
$destFile = Get-Item $destFilePath
if ($destFile.Length -eq $sourceFile.Length)
{
$destFile.LastWriteTime = $sourceFile.LastWriteTime;
$destFile.CreationTime = $sourceFile.CreationTime;

Write-Host ("SYNCED: " + $sourceFileName + " -> " + $destinationPath)
}
else
{
Write-Host ("SIZE DOES NOT MATCH: " + $sourceFileName + " -> " + $destinationPath)
}
}

$childFolders = [System.IO.Directory]::GetDirectories($sourcePath);
foreach ($childFolderName in $childFolders)
{
$childFolder = Get-Item $childFolderName
$destFolderPath = Join-Path -Path $destinationPath -ChildPath $childFolder.Name
$destFolder = Get-Item $destFolderPath
sync $childFolder.FullName $destFolder.FullName
}
}

$Source = Get-Item $SourceFolder
foreach ($destFolderName in $DestFolders)
{
$destFolder = Get-Item $destFolderName
sync $Source.FullName $destFolder.FullName
}

Reduce website download time by heavily compressing PNG and JPEG

PNG and JPEG are two most popular formats for web graphics. JPEG
is used for photographs, screenshots and backgrounds where PNG is
used for all other graphics need including cliparts, buttons,
headers, footers, borders and so on. As a result, these two types
of graphics file usually take up 80% of the total graphics used in
a website. Of course, there’s the GIF, which is very popular. But
as it supports only 256 colors, it is losing its popularity day by
day. PNG seems to be a all rounder winner for all kinds of graphics
need. As all browsers support PNG well enough and PNG supports
alpha transparency, it’s surely the best format so far on the web
for all purpose graphics need for websites. So, if you can optimize
all PNG and JPEG on your website and compress them rigorously, you
can easily shed off several seconds of load time from your website
without doing any coding. Especially if your website is graphics
rich like Pageflakes, 30%
reduction in total size of graphics throughout the website is a big
performance win.

Optimize all PNG on your website

PNG has a lot of scope for optimization. Generally regular
graphics tools like Photoshop, Paintshop pro, Paint.NET all
generate PNG using a moderate compression. So, PNG can be
compressed further by using advanced compression tools. OptiPNG is such a tool
that can compress PNG and sometimes produce 50% smaller output. At
Pageflakes, we have around 380 PNG which when compressed using
OptiPNG, gives us 40% reduction in total size. This is a big win
for us.

Here’s what wikipedia says about OptiPNG:

OptiPNG is an open source command line computer program that
reduces the size of PNG files. The compression is lossless, meaning
that the resulting image will have exactly the same appearance as
the source image.

The main purpose of OptiPNG is to reduce the size of the PNG
IDAT data stream by trying various filtering and compression
methods. It also performs automatic bit depth, color type and color
palette reduction where possible, and can correct some data
integrity errors in input files.

Here’s a poweshell script that you can run from the root folder
of your website. It will scan through all the PNG files in the
webtree and run OptiPNG on each file. This takes quite some time if
you have hundreds of files. So, you should make it a part of your
build script.

gci -include *.png -recurse | foreach
 { fileName = _.FullName; cmd /c "C:softpngoptipng.exe -o7 "fileName"" }

Here I have stored the optipng.exe on the c:softpng
folder.

OptiPNG gives very good compression. But there’s even more scope
for compression. AdvanceCOMP is the
ultimate in compression technology for PNG as it uses the mighty
7zip compression algorithm. It
can squeeze down PNG even further after being compressed by OptiPNG
using its maximum compression mode. PNG files are compressed using
DEFLATE algorithm. DEFLATE has 0 to 9 compression level, where 9 is
the highest. AdvanceCOMP uses 7zip DEFLATE encoder, that extends
the compression factor even more. During 7zip compression, a much
more detailed search of compression possibilities is performed, at
the expense of significant further processor time spent on
searching. Effectively, the 10-point scale used in gzip is extended
to include extra settings above 9, the previous maximum search
level. There will be no difference in decompression speed,
regardless of the level of compressed size achieved or time taken
to encode the data.

Here’s a poweshell script that you can run from the root folder
of your website. It will scan through all the PNG files in the
webtree and run AdvanceCOMP on each file. You need to run
AdvanceCOMP after running OptiPNG.

gci -include *.png -recurse | foreach
 { fileName = _.FullName; cmd /c "C:softpngadvpng.exe
 --shrink-insane -z "fileName"" }

I have collected both optipng and advpng in this
zip
file.

Optimize all JPEG on your website

Unfortunately, there’s not much powerful tool like OptiPNG for
jpeg that you can run on all your jpeg files and compress them
rigorously. JPEG file is compressed when it is saved. Generally all
graphics applications provide you an option to select what’s the
quality ratio of the jpeg being saved. So, you have to consciously
make the best compression vs quality choice while saving the jpeg
file. However, libjpeg project has a
jpeg optimizer tool that does some optimization on jpeg files. It
has a jpegtran utility which does the optimization according to
wikipedia:

jpegtran – a utility for lossless transcoding between different
JPEG formats. The jpegtran command-line program is useful to
optimize the compression of a JPEG file, convert between
progressive and non-progressive JPEG formats, eliminate
non-standard application-specific data inserted by some image
programs, or to perform certain transformations on a file —
such as grayscaling, or rotating and flipping (within certain
limits) — all done “losslessly” (i.e. without decompressing
and recompressing the data, and so causing a reduction of image
quality due to generation loss).

However, when we ran jpegtran on all the jpeg files in
Pageflakes, we are able to reduce about 20% total size of all jpeg.
So, that was not too bad.

Here’s how you run jpegtran to get all the jpeg files within
your website directory optimized:

gci -include *.jpg -recurse | foreach
 { fileName = _.FullName; newFileName = fileName + ".tmp";
cmd /c "C:softjpegjpegtran.exe -optimize -outfile "newFileName" "fileName"";
copy newFileName fileName; del newFileName; }

The libjpeg
binaries are uploaded here
for your convenience.

Warning: You have to run all these powershell commands in a
single line. I have broken the commands in multiple line for better
readability.

Let’s save global bandwidth, go green.