Windows Azure is offering Extra Small Virtual Machines (1 vCPU, 768 MB RAM) at $9/mo, free for first 3 months. Yes, you read it right. You can get a Windows VMs at $9 (until May 31st) and Linux VMs at $15, at the same rate as Amazon Micro Instance, which is free for first year (boo Microsoft!). However, MSDN Ultimate subscribers get 1500h worth of Small VM hours for free! It is a good time to grab a VM or two and setup your own servers, where you can host your own blog and showcase your awesome open source projects. VMs are your own mini server, where you get full remote desktop access and do whatever you like. You don’t have to be limited to a web based control panel. It’s your own baby server on the cloud, fully scalable and redundant.
In this article, I will show you show to setup a rock solid Linux instance and configure some useful security and maintenance features:
- Tune Apache, MySql, PHP to run within an Extra Small VM within the memory limits.
- Secure your server from common brute force attacks.
- Harden a WordPress instance and make it resilient to common failures.
- Optimize your website for maximum client side caching and improve page load time.
- Some handy Linux scripts and cron jobs that can take care of your server most of the time, identifying and fixing common problems and let you have your peace of mind.
This article is written from a Windows user point of view, who has never used Linux before. So, Linux gurus, don’t roll your eyes at me.
Create a Linux VM

Let’s first create a new Ubuntu server.

The admin user name on the Linux server is testadmin. We will use this to login to the Linux server.
Let’s select the “Provide Password” option instead of “Upload SSH key” to make the configuration simpler. If you use password option, then every time you login to the Linux VM using Putty (a client for working on Linux servers remotely from Windows), you will have to enter username and password. But if you use the certificate option, you won’t have to enter password always. It is definitely the better way to do it, but it is just a lot of extra steps to configure it. For simplicity, let’s ignore this for now.

Let’s name the server and choose a location where you want the server. You should choose a location where most of your users are going to come from. If you are hosting sites for Asia, do choose an Asian location. You will get much better website load performance because the network roundtrip time from your users computer to the server will be significantly lower.


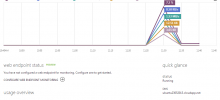
Once the VM is created, it will look like this:

Go to the “Endpoints” tab, and see the public port that has been opened for SSH. SSH is the Remote Desktop Protocol (RDP) equivalent for Linux.

So, the server’s DNS is ubuntu23052013.cloudapp.net and SSH public port is 54423.
Connect to the VM
Let’s get Putty and configure it to connect to this VM:

Put the DNS and the port. Then put a name on “Saved Sessions” and click Save. Then go to “Appearance” and change the font to Consolas, 15. Come back to this, and click “Save” again.
Now click “Open” and you will be taken to the remote session on the server. You will be asked to accept the server, just click Yes. Then use testadmin as username and the password you have configured while creating the VM.

Congratulations! You are now into a Linux server. Don’t be shocked, there’s no graphical client like Windows Remote Desktop. It is all command line based console. But you will be amazed how quickly you can get things done on Linux via command line. Windows Command Line isn’t even remotely close to being as powerful as Linux.
First, we will go to elevated command line, using the linux “sudo su” command.

When you see “root@Test”, that means you are in “root” mode (Windows equivalent of Administrator privilege).
Setup upgrade
Let’s do a quick check to see if there’s any upgrade pending. Run the command “do-release-upgrade”.
root@Test:/home/testadmin# do-release-upgrade
Checking for a new Ubuntu release
No new release found
Best to do the upgrade first before you configure anything.
By the way, you can copy some text and paste it into Putty by just right clicking on the Putty window.
Now let’s setup automatic security patch installation by running this command.
unattended-upgrade
Add swap file to get virtual memory
Linux VM doesn’t come with Swap file. That means you only have the 768 MB RAM to play with. If by any chance any application exceeds the RAM, it crashes. So, you need to add a swap file so that you get plenty of virtual memory to play with.
Run the command “swapon –s” to check if there’s any swap file. If none, it will look like this:
root@Test:/home/testadmin# swapon -s
Filename                                Type            Size    Used    Priority
root@Test:/home/testadmin#
Let’s create one:
dd if=/dev/zero of=/swapfile bs=1024 count=512k
This will create a 512 MB empty file.
You should see an output like this if everything works out:
root@Test:/home/testadmin# dd if=/dev/zero of=/swapfile bs=1024 count=512k
524288+0 records in
524288+0 records out
536870912 bytes (537 MB) copied, 20.4811 s, 26.2 MB/s
Now run these two commands to make that file the swap file:
mkswap /swapfile
swapon /swapfile
Let’s check again if the swap file is now working:
root@Test:/home/testadmin# swapon -s
Filename                                Type            Size    Used    Priority
/swapfile                               file            524284  0       -1
Now the swap file is there and turned on.
Now the problem is, when you VM will reboot, the swap will be gone. So, to make the swap permanent, we need to do something more.
nano /etc/fstab
This will open a text editor which should look like this:

Welcome to the world of Text based computing! This is usually a shocker for Windows users. There’s no Notepad guys.
Now, go to the end of the file and add this line:
/swapfile none swap sw 0 0
It will then look like this:

Now here’s the awesome thing. How do you save and exit?
Press Ctrl X, then Y, then ENTER. Yes, it is not Windows. It takes a while to get used to it.
After exiting, run this command:
chown root:root /swapfile
chmod 0600 /swapfile
This will set proper permission to the swap file.
Now let’s reboot and make sure the swap file is there.
reboot
After the system is back and you have logged back in and run the “sudo su” command to get into root access, run “swapon –s” to check if the swap is working.
You can also use “free” to see how much RAM and swap is getting used. It is a very handy command to check if your server is suffering from memory issue:

It shows swap is there for use.
Install LAMP stack
LAMP means Linux, Apache, Mysql and PHP. That’s the pre-requisite for getting WordPress to run.
Run these two commands:
apt-get install tasksel
tasksel
It will start a Wizard to configure the LAMP server and install all the stuff it needs.

Select LAMP.
You should be asked for password for the MySQL root user account:

Once it is complete, you should have a LAMP stack ready and there will be a webserver running that you can test.
You need to open the HTTP port 80 on your VM from Azure firewall:

Go to Endpoint and create a new endpoint and map port 80.
Wait at least 5 mins after Azure says it is done. I could not hit the site immediately after getting complete message. I had to wait for some time.
Now, the moment of truth:
http://ubuntu23052013.cloudapp.net/

The web folder is at /var/www. This is the equivalent of c:inetpubwwwroot in Windows.
You will find an index.html file there, which is what you see when you browser your server.

Let’s create a test.php file there to make sure PHP is working.
nano test.php
Then put this into the file:
<?php phpInfo() ?>
Ctrl+X, Y, ENTER to get out of nano.
Now hit this file on browser:
http://ubuntu23052013.cloudapp.net/test.php
You should see this:

This means PHP is ready and you are now ready to install WordPress.
Tune MySQL to consume less memory
On an extra small VM, we have very limited RAM. So, we need to tune MySQL to use as little RAM as possible. So, we need to change the mysql config files to make some adjustments.
First, backup the config file.
cp /etc/mysql/my.cnf my-original.cnf
Now let’s make some changes. I usually change the following values:
# * Fine Tuning
#
key_buffer              = 1M
max_allowed_packet      = 1M
thread_stack            = 64K
thread_cache_size       = 8
innodb_buffer_pool_size = 1M
The last entry, innodb_buffer_pool_size may not be there. In that case, you will have to add that line. All of these lines are inside the [mysqld] section. Make sure you put them inside the [mysqld] section and not after any other section.
You need to use nano to open the /etc/mysql/my.cnf file and make these changes.
Install SMTP server
You need to install a SMTP server in order to send email from your server. Postfix is the name of the server. Here’s how to install this:
apt-get install postfix
You should see a config screen:

Then you will be asked to put the fully qualified DNS for your website. If you are finally planning to host your site on a domain like example.com, then put that here. Or you can put the Azure DNS for now and later on add your final domain in the Postfix config file.

Let’s test sending email. First install a mail utility to send email:
apt-get install mailutils
Once it is installed, test sending an email:
echo "Test mail from postfix" | mail -s "Test Postfix" youremail@email.com
You should receive an email. if not, then Gmail doesn’t accept mails from your server. If you aren’t receiving email, then check the last entries from the log file to see what’s wrong:
tail /var/log/mail.log
Configure a website to be served on a domain
Say you have a website, example.com to be served from your server. You need to create something called “Virtual Host” in Apache’s term. It is equivalent to IIS Website.
First create the folder where all the files for the website will reside:
mkdir -p /var/www/example.com/public_html
chown -R $USER:$USER /var/www/example.com/public_html
chmod -R 755 /var/www
cp /etc/apache2/sites-available/default /etc/apache2/sites-available/example.com
The last line creates a sample configuration for the website. Then edit the /etc/apache2/sites-available/example.com file to configure the virtual host with the correct configuration using nano:
nano /etc/apache2/sites-available/example.com
After editing the file will look like this:

First you add the ServerName and ServerAlias. Then you change the DocumentRoot from /var/www to the /var/www/example.com/public_html
Then you change the three occurrences of AllowOverride to AllowOverride All. This will come handy when we will setup a .htaccess file.
Now enable the website:
a2ensite example.com
a2dissite 000-default
Now let’s install some modules that you will need to boost site performance and enable caching.
a2enmod rewrite
a2enmod headers
a2enmod expires
Finally, restart Apache.
service apache2 restart
If you see a warning message like this:
* Restarting web server apache2
 apache2: Could not reliably determine the server's fully qualified domain name, using 100.88.124.9 for ServerName
Then open the apache config file:
nano /etc/apache2/apache2.conf
And add this line:
ServerName example.com
Then try restarting apache again. It should fix the problem.
Let’s verify the site is configured properly. Run this command:
grep -R AllowOverride /etc/apache2
You should see the output should contain these three lines:
/etc/apache2/sites-enabled/example.com:         AllowOverride All
/etc/apache2/sites-enabled/example.com:         AllowOverride All
/etc/apache2/sites-enabled/example.com:         AllowOverride All
This means the site is now enabled (as it is in sites-enabled folder) and the AllowOverride is done properly.
Now we need to create a file on the virtual host (website) and see if the site works:
nano /var/www/example.com/public_html/index.html
Put something there and then hit the URL.
Before hitting URL, you need to put the Public IP of the server in your local PC’s hosts file. In Windows, it is c:WindowsSystem32driversetchosts. You should add something like this:
137.117.135.68 example.com
Now you can hit the http://example.com on browser and it should show:

This means we have got virtual host configured. Now you just have to map your domain to the IP of the VM.
Install WordPress
Now we will install the WordPress engine. First go to your /home/testadmin directory and then run the following commands.
cd /home/testadmin/
wget http://wordpress.org/latest.tar.gz
tar -xzvf latest.tar.gz
cp ./wordpress/wp-config-sample.php ./wordpress/wp-config.php
Now create a MySQL database for wordpress:
mysql -u root -p
Enter the password you used while installing LAMP.
Then run these commands in the MySQL command prompt:
create database wordpress;
GRANT SELECT, INSERT, UPDATE, DELETE, CREATE,
  DROP, INDEX, ALTER, CREATE TEMPORARY TABLES,
  LOCK TABLES ON wordpress.*
  TO 'wordpress'@'localhost'
  IDENTIFIED BY 'Wordpress123';
FLUSH PRIVILEGES;
This will create a database named wordpress, then create a database user named wordpress with password WordPress123 and give permission to that wordpress database. To confirm the user can access the database, quit from mysql command prompt and try to login using the wordpress user account:
mysql -u wordpress -p wordpress
If this works, then you have created the wordpress database and user properly.
Now we need to configure the WordPress config file:
nano ./wordpress/wp-config.php
There are 3 entries to fix:

Ctrl X, Y, ENTER out of nano.
Now copy the whole wordpress folder to the virtual host folder:
cp -r ./wordpress/* /var/www/example.com/public_html/
cd /var/www/
chown www-data:www-data * -R
usermod -a -G www-data testadmin
In the last line, we have the admin user name. Make sure you have got it right.
Remove the index.html file and your wordpress will be up and running.
rm /var/www/example.com/public_html/index.html

Do the configuration. Change the “admin” user to something else. You will be saved from many brute force attacks.
Tuning wordpress installation
In Apache, there’s something called .htaccess file, where you can define site specific settings like – caching of static files, handling 404, rewriting URL etc.
I have created a .htaccess file that is suitable for wordpress and ensures site produces properly cached static files and handles 404 properly. You can get the file content here:
https://gist.github.com/oazabir/5637290
It also makes WordPress support extensionless URL for posts.
Copy the raw content and then create a .htaccess file in the public_html folder and paste it:
nano .htaccess
Right click on nano and the content will be pasted. Ctrl X Y ENTER out of nano.
Make sure your wordpress site is still running. If not, then you have incorrectly copied .htaccess file content.
Install some essential WordPress plugins
You should install the following plugins:
- WP Security Scan
- BackWPup
- Configure SMTP
- Jetpack by WordPress.com
Just copy and paste these names into the search box while adding new plugin.
Monitoring traffic on Apache
Apachetop is an awesome tool that shows you traffic hitting your website in near real time. Install it using:
apt-get install apachetop
Then run apachetop and you will see traffic like this:

Checking for missing and failing URLs
You should regularly check for 404 and 500 errors on your website. This will help you identify missing links and correct those links on your WordPress posts. HTTP 500 pages will give you an indication what is failing on your website and whether you are under some attack.
tail -n 10000 /var/log/apache2/access.log | awk '($9 !~ /200|304/)' | awk '{print $9,$7}' | sort | uniq
This will process the last 10k lines from the Apache access log (equivalent to IIS website log) and show you URLS which aren’t 200 and 304. It’s a good starting point to check which URLs are failing and fix them one by one.
Detect site failure and auto restart webserver
You can create a cron (equivalent to Windows Task Scheduler) to run say every 10 minutes and check if your site is still running. If not, it will restart Apache and MySQL.
FILE=/home/siteup.log
SITE=http://quranerkotha.com
SIZE=`stat -c %s $FILE`

# Delete the file if it is over 1MB already
if [ $SIZE -ge 1000000 ]; then
	rm FILE
fi

# IF the site doesn't response within 15 sec, time to kill apache and mysql
if wget --timeout=15 --read-timeout=15 -O /dev/null -q $SITE
then
	echo "Site is up" >> $FILE
	date >> $FILE
else
	echo "Site is down" >> $FILE
	date >> $FILE
	/usr/bin/killall apache2 >> $FILE
	/usr/sbin/service mysql restart >> $FILE
	/usr/sbin/service apache2 restart >> $FILE
	wget --timeout=30 --read-timeout=30 -O /dev/null -q $SITE
fi
Save this in a file inside the /home/testadmin folder. Say the file name is “checksite”.
First, you need to give this file execute permission. In Linux, you can’t just write a batch file like file and run it. You have to give that file execute permission.
chmod +x checksite
Now you can test the file by running ./checksite command.
If it is running fine, then let’s setup a cron which will make this script run every 10 minutes.
Run:
crontab -e
This will open a sample file. Go to the end of the file and put these lines:
SHELL = /bin/bash
PATH = /usr/bin/:/bin:/usr/sbin
*/10 * * * * /home/testadmin/checksite >> $HOME/uptime.log 2>&1
Save the file and exit. Wait for 10 minutes. It should run the script and produce a file in /root/uptime.log folder.
You can view the content of the file using cat command.
cat /root/uptime.log
This will show you if the site was down at some time.
Detect rogue process and kill them automatically
Sometimes there might be some process that keeps consuming 100% CPU all the time and brings down your server. Sometimes it happens to Apache process if you are under attack and the attacker has found a way to hit som expensive page that consumes high CPU. In that case, you will need some automatic way to kill top CPU consuming process and recover the server. Here’s a script to do that:
#!/bin/bash

CPU_LOAD=$(uptime | cut -d"," -f5 | cut -d":" -f2 | cut -d" " -f2 | sed -e "s/$
CPU_THRESHOLD=100

if [ $CPU_LOAD -gt $CPU_THRESHOLD ] ; then
  echo $CPU_LOAD exceeded threshold
  ps -eo pcpu -eo cmd | head -n 5
  kill -9 $(ps -eo pid | sort -k 1 -r | grep -v PID | head -n 1)
  echo Top process killed
  CPU_LOAD=$(uptime | cut -d"," -f4 | cut -d":" -f2 | cut -d" " -f2 | sed -e "s$
  echo CPU load after kill $CPU_LOAD
fi

exit 0
Save this file and use chmod to give it executable permission. Then use crontab –e command to add the following line:
*/10 * * * * /home/testadmin/killtop >> $HOME/killtop.log 2>&1
It will run this script every 10 minutes and the script checks if the server has been consuming 100% CPU on average in last 10 minutes. If it is, then it will find the top CPU consuming process and kill it.
Now the CPU_THRESHOLD value needs some discussion. The “100% utilization” mark is 100 on a single-core system, 200, on a dual-core, 400 on a quad-core, etc. This article has a very nice discussion on this.
Tuning PNG, JPEG for faster site load performance
You can use OptiPNG and JpegTran, two utlities to heavily compress PNG and JPEG files in your website. Sometimes these tools save 70% file size.
First install these tools:
apt-get install opting
apt-get install libjpeg-progs
Now use this command to compress all files inside your web directory. You need to first get into the web directory and run these commands:
cd /var/www/example.com/
find . -type d -exec sh -c "cd "{}" && pwd && optipng -o7 *.png" \;
find . -name '*.jpg' -exec jpegtran -optimize -verbose -outfile {} {} \;
You can save these commands in a script file and run the periodically. They will take a very long time to run, but they might save a lot of download bandwidth on your website and increase your page load performance significantly.
Protecting your website from brute force attack
Someone can write a simple script to continuously hit your virtual server and consume 100% CPU on the server. VMs aren’t as powerful as physical servers. So, they run out of capacity pretty quickly, epecially Extra Small VMs. So, you need to install mod_evasive module in Apache to prevent someone from continuously hitting your website and consume all available system resource.
First install the module:
apt-get install libapache2-mod-evasive
Now you need to create a log folder where the blocked IPs will be logged:
mkdir /var/log/apache2/mod_evasive
chown www-data:www-data /var/log/apache2/mod_evasive
Open the mod_evasive configuration file at
/etc/apache2/mods-enabled/mod-evasive.conf
and put this:
<ifmodule mod_evasive20.c>
   DOSHashTableSize 3097
   DOSPageCount  1
   DOSSiteCount  20
   DOSPageInterval 10
   DOSSiteInterval  10
   DOSBlockingPeriod  60
   DOSLogDir   /var/log/mod_evasive
   DOSEmailNotify notify@email.com
   DOSWhitelist   127.0.0.1
</ifmodule>
This is a *VERY* restrictive setting. It will only allow someone to hit the same page on your blog site once every 10 seconds. I started with the default settings, but my site was going down from some brute force attack or some crawler, which was continuously hitting some page on my site. So, I kept lowering it down to this value. It’s been 3 days. So, far no downtime.
Conclusion
In this article, we have learnt you to setup a Linux VM in Windows Azure. We have also learnt how to install LAMP, configure and tune Apache, MySQL, WordPress. We have learnt some handy tricks to monitor the server, do regular housekeeping and also setup some automated job that can save you from waking up at 3 AM in order to recover your server.
Update site check and restart apache+mysql script is here:
https://gist.github.com/oazabir/11342910
Here’s a script that will check if a site is up and running, if not send email notification
https://gist.github.com/oazabir/11343018
You can call it like this:
./monitorsite http://mysite.com/ log.log “[ERROR] Site down” your@email.com
Omar, thank you for info.
Thank you so much for your time. Straight forward and more helpful.
Hello Omar,
this seems the most thorough tutorial for a noobie like me. I am stuck at the point where I am testing the test.php file. It can not locate it. Do you have any idea what the fault is?
Thank you for sharing.